Over time, the handle of your Moen bathroom faucet may become loose, causing it to wobble or even leak. Fortunately, tightening a Moen bathroom faucet handle is a relatively simple process that can be done with essential tools and a little know-how. In this informative blog post, we will provide a step-by-step guide on tightening a Moen bathroom faucet handle, ensuring a secure and functional fixture in your bathroom.
How to Tighten Moen Bathroom Faucet Handle?
Tools Needed:
When replacing your kitchen faucet, you’ll want to gather a few essential tools that should be found in any home toolbox. The most important is an adjustable wrench or pliers for loosening and tightening nuts and bolts.
A screwdriver will come in handy for removing screws that hold the faucet assembly in place. For most models, a simple Phillips head screwdriver is all you need, but some faucets use flathead screws instead.
Your particular faucet style may require a small Allen wrench as well. Allen bolts are commonly used to affix the handle or spout section on newer faucets.
Having these versatile hand tools is really all that’s required for the typical DIY faucet switch-out job. No power tools, drills or speciality equipment are needed. Just an adjustable wrench or pliers, the appropriate type of screwdriver for your screws, and possibly an Allen wrench if your manual calls for it.
Armed with just these few basic workshop essentials, you’ll be set to tackle removing your old faucet and installing the shiny new one in no time.
Step-by-Step Guide: How to Tighten Moen Bathroom Faucet Handle?
1. Turn off the water supply:
We need to turn off the water supply so no leaks or sprays occur while we work. Under the sink are two angular knobs that control the hot and cold lines – give each a quarter turn clockwise using an adjustable wrench or your hands until they stop. Check by turning on the faucet – you shouldn’t get any flow.
2. Identify the handle type:
A typical modern style is the single-handle faucet, with one central body and spout controlled by a single lever or cartridge. On these, look for a small screw, usually on the bottom of the handle itself or sometimes hidden under a decorative cap.
Older two-handle faucets from the past have separate hot and cold valves or knobs. Each of these base areas will need any caps or cover plates gently removed to find the mounting screws hiding below.
Some newer single-handle kitchen fixtures feature pull-down or pull-out spray heads attached to the central handle portion. These function differently than fixed models, so checking manufacturer instructions specific to your setup is wise.
Knowing whether your current fixture has one central handle, two separate ones, or pull-out spray capabilities will help guide how to disconnect the knobs or levers carefully. Taking a moment to identify these handle details is a valuable prep step before starting the replacement process.
3. Remove the decorative cap or cover plate:
Single-Handle Models:
Look on the bottom of the handle for a small set screw. Use a screwdriver to loosen and uninstall the screw. Sometimes a decorative cap hides the screw – gently pry it off to reveal the screw below. If you like to to buy single handle faucet then you may check Moen Align bathroom faucet.
Two-Handle Faucets:
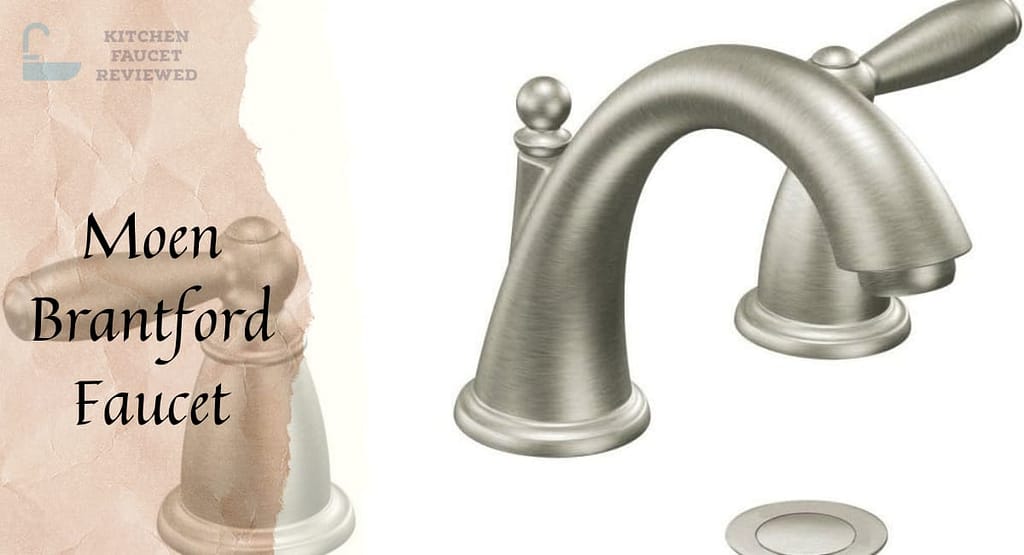
These dual-handle styles have individual caps covering each base like Moen Gibson bathroom faucet. Employ patience and care when nudging under a cap’s edges with a flathead screwdriver to pop them free of the stems. Be wary of brittle plastics cracking. There are more Moen 2 handles faucets like Moen Banbury, and Moen Brantford.
Common to Both:
Go slowly, and don’t force anything. Taking a moment to locate the capping mechanisms precisely saves frustration later. Once the covers are off, the underlying handle attachment points will be exposed for safe disassembly.
Proper Identification and Removal Prep:
Familiarizing yourself with handle covering styles beforehand means the actual ‘switch out’ process can go smoothly. With some alertness and care, any securing pieces can be comfortably disconnected.
The general goal is to expose the cores holding everything in place for the next steps. With minor adjustments and vigilance, faucet parts cooperate easily.
4. Tighten the handle:
After removing any existing caps or plates, the mounting screws will be exposed for access. Grab your adjustable wrench or pliers and turn the screws clockwise to tighten.
Go slow here – snug is sufficient; no need to crank with extreme force. Overtightening risks internal damage to the unit. As soon as resistance ends, you’ve achieved a secure fit.
Faucets using set screws get treated similarly. Locate the small allen-headed bolt and turn clockwise to fasten the handle portion firmly. Again, moderation is vital to avoid stripping or cracks.
Proper but not overzealous tightening ensures a long-lasting repair. Take your time to feel the tightness sweet spot versus brute forcing it. A cautious hand leads to smooth sailing long-term.
Remember, too, it’s better to leave a connection slightly loose than brutally crushing it. A kind approach to assembly benefits the user experience. With care, your new handle will stay anchored for years to come!
5. Reassemble the faucet:
Once the handles are securely fastened, it’s time to wrap things up. For dual-valve models, gently reposition any removed face plates or caps back over the handle stems.
Single-lever fixtures call for replacing screw covers or decorative tops as well. Taking your time leads to smooth reassembly.
Remember to double-check alignment and stability before moving on. Give knobs a test twist to ensure everything feels snug and aligned.
Nearing the end:
The final checkpoint before opening the water lines is the careful reattachment of cosmetic pieces. Slow is smooth, as they say – there’s no rush to complete this last step.
Proper care up front and spending extra moments guaranteed long-lasting results. Soon, you’ll be drying your hands and admiring your new fixture; I am happy you did it right!
6. Turn on the water supply:
We’ve made it to the end of our Moen bathroom faucet refresh – now to rinse away the whole experience!
Under the sink lie those familiar angle stop valves. Place your tool on the special nuts and twist counterclockwise to open the gates once more.
Move steadily: there’s no rush now that your work is done. Gradually release the water pressure build-up.
Stand back and keep an eye out for any dampness as flow resumes. Check your new hardware by turning handles. Does everything feel solid?
Take your time inspecting amateur improvements, which sometimes appear later. But don’t fret if tiny tweaks remain; living with such projects makes future tasks easier.
If all’s well, you can celebrate a job well done! Relish the rejuvenated sink space and your growing DIY skills. Perhaps inspiration strikes for another project another day.
For now, though, it’s time to let this chapter close. Treat yourself to a well-earned beverage while reflecting on lessons learned. With practice, home improvements become your new routine, too.
Conclusion – How to Tighten Moen Bathroom Faucet Handle?
With the proper identification of your specific faucet handle type and the right tools, tightening a Moen bathroom handle is a straightforward process. Single-handle models typically feature an easy-to-access set screw on the underside that requires tightening with an Allen wrench. Dual-handle faucets may have slightly more involved decorative caps to remove before accessing the mounting screws below.
No matter the style, taking your time to methodically work through each stage – from safely shutting off water to exposing fasteners to securing the handle with just the right tightness – will lead to a well-finished result. Going slowly prevents frustration and ensures the job is done right. And with some newly gained experience under your belt, future bathroom fixture adjustments will feel even more familiar.
Always remember that moderation and care for the components are essential. With patience and the proper techniques, Moen handles can be easily tightened. Once reassembled and water flow tested, you’ll be left feeling a sense of satisfaction from tending to simple home maintenance tasks yourself. Overall, with the right approach, this quick update project is fully accessible for any DIYer looking to spruce up their bathroom.
FAQs
Q: I can’t find the set screw on my single-handle faucet. Where is it located?
A: If you don’t see the set screw on the bottom of the handle, look for a small decorative cap that is concealing it. Gently pry the lid up with a flathead screwdriver to access the screw underneath.
Q: The cap and set screw are stuck – how can I remove them?
A: Try placing a thin rag or cloth between the screwdriver and cap to help grip it without damaging the surface. You can also try penetrating oil sprayed around the edge to help loosen debris or corrosion. Go slowly and carefully.
Q: The handle is still wobbly after tightening; what else can I do?
A: Check that the retaining nut inside the valve body is also tightened fully. You may need extra hands to hold the valve body steady while tightening the nut with channel locks or an adjustable wrench. Retighten the handle set screw afterwards.
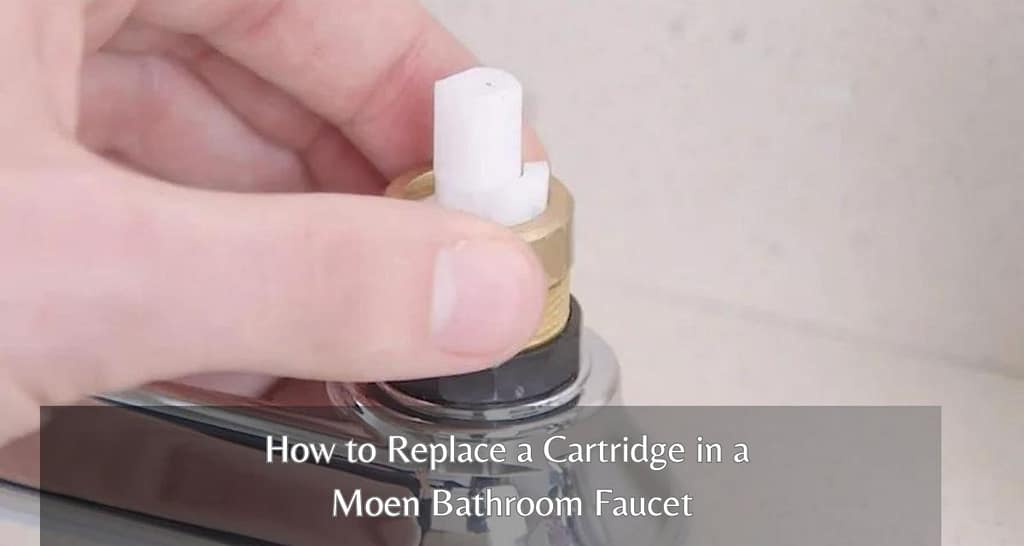
Q: How do I replace the whole faucet cartridge instead of just the handle?
A: Most Moen cartridges are replaceable from the top without removing the faucet body. Look up your specific model for instructions, which generally involve shutting off the water and removing the handle/faceplate to access the cartridge retaining nut. Check how to replace cartridge in Moen bathroom faucet.
Q: The handles are hard to turn, even after cleaning. Do you have any suggestions?
A: Over time, mineral deposits can build up and cause friction. Try soaking the faucet bodies in white vinegar or using a cleaning solution before reassembling them. You may also need to replace old cartridge valve internals for smoother movement.