Have you ever found yourself cursing up a storm while trying to wrestle out a stubborn faucet cartridge? I’ve been there myself, and there’s nothing more frustrating than a valve that just won’t budge. But have no fear, help is here in the form of one handy little tool: the cartridge puller.
Specifically, we’re talking about Moen cartridge pullers today. For those of us with Moen kitchen or bathroom faucets, these pullers are absolute lifesavers. They’re designed to get a solid grip on those cartridges, which, as I’m sure you know, can be extra tight-fitting.
So whether you’ve got a kitchen sink that’s on the fritz or a shower valve acting up, a quality Moen puller is your new best plumbing pal. In this guide, I’ll walk you through how to use a Moen cartridge puller.
By the time we’re done, you’ll be a pro at removing and replacing cartridges just like me. No more swearing or sore wrists!
What is a Moen Cartridge Puller?
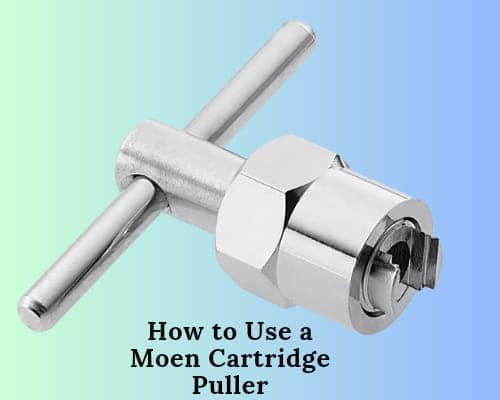
A cartridge puller is a simple and valuable tool with prongs or claws that grasp the sides of the cartridge firmly. With a gentle twisting motion, it loosens those pesky valves from their housings so you can swap them out in a jiffy.
Cartridge pullers originally got their start for the super popular Moen faucets, since those cartridges can be especially tight. But nowadays, you’ll find generic pullers that work on just about any brand. The aftermarket ones do the job just as well but are usually cheaper than the name-brand versions. Sometimes when you buy a replacement cartridge, they’ll even include a puller in the package!
How to Use a Moen Cartridge Puller?
Step 1: Time for a Cartridge Change
We need to cut off the water supply. Find your main shut-off valve, usually under the kitchen sink, and give it a turn. No need to get soaked while working!
Next, remove that handle. Just pop off the cap and loosen the mounting screw underneath. The escutcheon trim piece may have a few screws holding it in place too.
Expose the cartridge itself. This is where a good pair of needle-nose pliers comes in handy. See that little clip keeping the cartridge secured? Gently but firmly grip it with the pliers and give it a wiggle-free. Make sure to hang on to that clip though – we’ll reuse it in a bit.
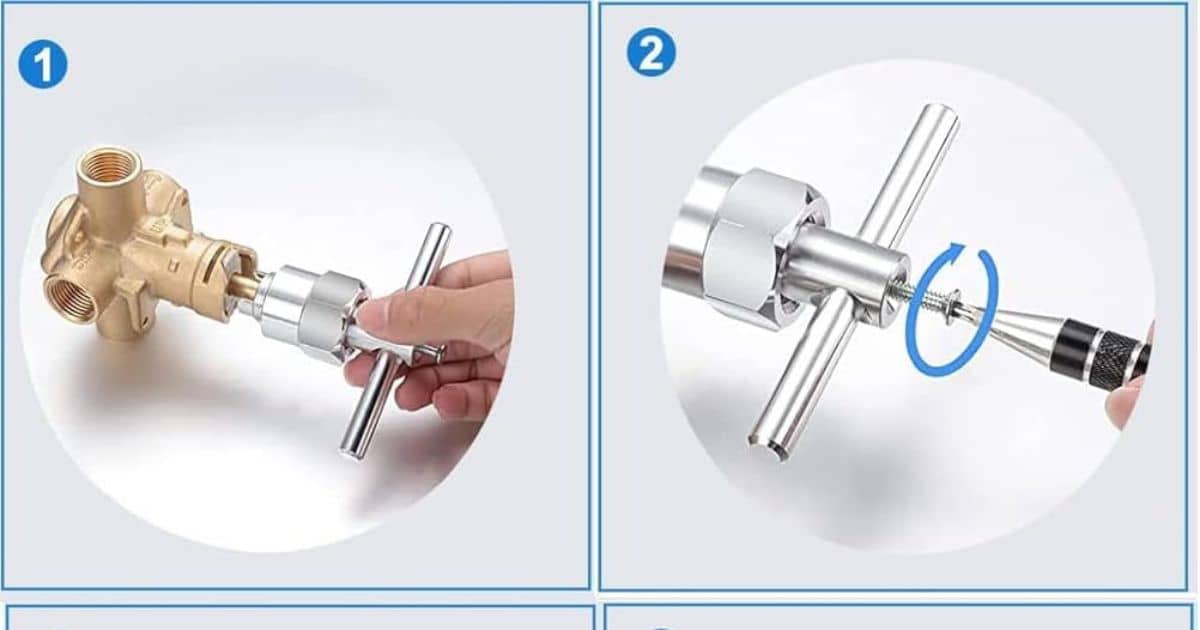
Step 2: Use the Cartridge Puller
I hope that the cartridge is starting to feel loose after exposing it. But if it’s still stubbornly stuck, it’s time to bring out the big guns – the cartridge puller!
This handy tool has a couple of prongs that will gently but firmly take hold of your cartridge. The first thing is you’ll want to separate the puller’s two parts so it’s in its full open position. Just back out that center screw all the way.
Next, carefully position the puller so those prongs straddle the raised middle of the cartridge. You want it to fit snugly in place without any wiggle room.
At this point, your cartridge is fully in the puller’s grasp. Now it’s just a matter of gentle yet firm twisting. With any luck, that valve will start to surrender to the puller’s hold. Go slow and steady – you don’t want to use too much force.
If all goes well, your cartridge should start loosening up once that puller gets a good grip. Just keep at it until it’s free.
- Replacing Kohler Bathroom Faucet Cartridge
- Cartridge of Delta Faucet?
- Replacing Cartridge of Moen Bathroom Faucet
Step 3: Secure the Cartridge Puller
Take your screwdriver and start threading the puller’s screw inward. It’ll go into the same hole that held your faucet handle in place before. Give it a few turns to tighten it up snugly.
If for some reason the screw won’t go all the way in, don’t force it! That’s a quick way to strip out the threads. Instead, back it out a bit and double-check your puller placement. Make sure those prongs have a good hold of the cartridge center before re-driving the screw.
A little alignment goes a long way here. Take your time getting the puller set just right so it can do its job. You want a tight, secure fit so the cartridge doesn’t slip free while you’re working.
Once that screw is tightened down, you’ve really got your target locked in. From here, it’s just a gentle twisting game until that stubborn valve comes loose. You’ve got this, just work methodically and that cartridge will surrender before long!
Step 4: Extract the Cartridge
Take a firm grip on the puller’s handle. Then slowly start twisting it back and forth while gently pulling straight out. The key is that twisting motion – it helps break the seal holding your cartridge in place.
Keep at it, twisting and pulling. You’ll feel it start to loosen more and more with each turn. Go slow and steady. No need to muscle it; let the puller do its job with finesse.
Before long, you should start to feel some give. That’s your sign it’s almost ready to depart. Just a few more twists.
Take a look inside – is it all clear for the new cartridge to move in? If so, congratulations! You just successfully performed cartridge removal like a pro. Smooth sailing from here to finish up the job.
Step 5: Clean Your Tools
We always want to keep our tools in good shape so they’ll be ready for future jobs.
Take a minute to wipe down that cartridge puller now that it’s done its task. A little cloth with some light oil, like 3-in-One or WD-40, does the trick. Just rub it all over to prevent corrosion from setting in.
You’d be amazed how a few minutes of maintenance can extend the life of your gear. Treat your tools right and they’ll be there to help out for years to come.
And a quick tip – if you happen to be sans puller, those trusty pliers can do the job in a pinch. Just grip the cartridge stem firmly and gently work it free. It might take a bit more elbow grease, but it’ll get unstuck.
Well friends, I’d say that’s a successful cartridge change! As always, let me know if you need any other plumbing pointers down the road. Happy fixing!
Final Verdict
So next time you’re cursing under your breath trying to wrestle out a stubborn cartridge, remember the cartridge puller is your new best buddy. Just a few dollars invested will save you loads of frustration. Who knows, you might even enjoy the project once that little valve surrenders to the puller’s grip! Consider adding one to your toolbox – it’s a handy helper to have around the house. I hope this information will you how this toop can be used.